Things to do list

  • Workshop Tips
  • Bread Rolls
  • Gourd Crafts
  • More Toys

Counter

Thursday 13 August 2009

Tap that...

...sorry Megan McCauley wink

Today, Scarecrow went to turn a tap off but it would not turn off.
eek

Enter Super-Doc the washer-changing legend in his own lunchtime.
biggrin


Changing a tap washer is easy but for those who may not have done it before, it can be daunting, so here is how I do it.

Firstly, turn off the mains water.
rolleyes

Depending on where you live, this is often found near the front fence line of your property.

If you have never found yours before, now is a good time to look.

Grab some tools; a reseating tool, washers and adjustable wrench. Some old rubber tubing to protect the chrome if it is an inside tap.


Using your wrench, undo the tap.

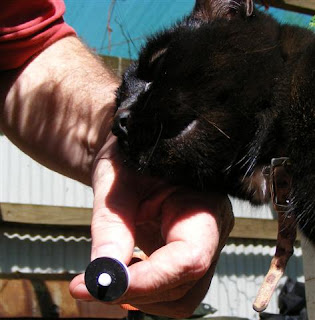
Remove the assembly and check the washer. Get approval from a professional.


You can see the split in the washer at eight o'clock, can you not, Ninja.


Using the reseating tool, attach and proceed to screw it gently to clean the surface where the washer will meet the brass of the tap.


Grab your new washer and get approval to install it.


Screw the tap assembly into the base.


Go and turn on the mains water.

Admire the end result.


Not exactly rocket science, hey, but still has to be done. cool

Doc
wink

Back to my rocket science now. smile

Sunday 9 August 2009

Baby, it's cold outside...

...so get Doc to extend your hothouse biggrin

Recently Scarecrow asked if I could extend her hothouse so she could do more hothousey things.

You would have to ask her what she does in there.

T'is all magic to me.
eek

Since I had recently 'acquired' a few old windows, it seemed like a great way to win her heart.
cool

Okay, this is not rocket science, so listen closely.

Step 1
I took down the old tin that was on the side of the hothouse, leaving the side exposed.


The cat found a spot close enough by to watch me, far away enough to not get in the way (much).

Here is an action shot of the cat.
rolleyes


Step 2

I put in new holes (and old posts) after measuring up(ish) any vital distances, you know, 'how tall is the window', 'how wide is the window', 'how much plywood is needed to fill the gap' etc etc.


Step 3

I attached the windows by screwing the wooden frames onto the posts.

Plywood was screwed into the posts, as well, under the windows, to fill the gap.


Step 4

The top of the posts were cut flush with the top of the windows but I had to find a home for this little dude first.


Transparent sheeting was attached to the top and the windows remind me that they probably need a wash.


Finished outside (Scarecrow started loading it up from within).


Finished inside (had to move Scarecrow out of the way to get the piccy. There was no hurry for the extension, she said).


Anyhoo, howzat!
biggrin

Lurv, peace and mungbeans


Doc
wink