Things to do list

  • Workshop Tips
  • Bread Rolls
  • Gourd Crafts
  • More Toys

Counter

Showing posts with label Misc. Show all posts

Friday, 3 June 2011

Thank you blogger:

I would just like to thank Blogger and all those associated with it for somehow losing all the comments on my posts.

You people don't happen to work for the Australian government do you. They seem to be about as competent with the interwebs as you guys!

How am I supposed to remember which jokes I used razz

Now I have to go back to the real world and play.

Thanks to all my followers for following. I will post something less melodramatic when I can.

Doc wink

Apparently light travels faster than sound - this explains why some people appear bright until they open their mouth.


.

Wednesday, 31 March 2010

Luckydog has died...

...long live Luckydog.

Luckydog, our very friendly, very old, very blind, very deaf but lovely dog has died in her sleep.

She was a waggly sort of dog - the kids loved the way her tail would be three times more excited than the rest of her body.

She was well loved and will be missed by all who knew her or who ever had the privilege of having their butt sniffed by her.

Scarecrow has a much better pictorial valediction to the dog than I could ever come up with over here.

Life goes on.

Will miss you.

Vale Luckydog

A sad Doc

Saturday, 6 March 2010

There's a hole in my bucket, dear..

...Scarecrow, dear Scarecrow.

But don't worry, it's supposed to be there!

Sprouting grain for the egg-layers

This tutorial is about creating an easy container set up to sprout grain for the chookens in your life. You could probably do this for your family, too, but being only two of us now, we use a smaller set up for that - the old jar and stocking jobby, but that's another story.
wink

Anyhoo, the boss lady likes to feed the chookens (poultry, hens, chickens, chooks, fowl, ferals <--- just helping out search engines) a variety of sprouted grains - wheat, barley, oats, alfalfa etc. Apparently, these are really good for them. Must be, they are all healthy, mad and provide great entertainment around the place.
cool

Wadjaneed
A couple of buckets - plastic is easier to make holes into
A drill and bit or a candle and sharp implement for hole making
'nother couple of buckets to put your holy buckets into - you'll see what I mean
Five minutes between other projects

Important warning
If you are an idiot: Do not attempt any of the following because it involves sharp things and spinning things. Idiots should not access either of these things.
eek

If you are sensible: Watch out for flying sprue whilst drilling because it could get you in the eyes and hurt.

Here are two buckets.

Keeping up so far? biggrin


With your low speed, rechargeable drill or sharp, pointy implement, make holes in the bottom of the buckets.

Try not to drill holes that might look like some sort of secret message otherwise you are bound to offend some bunch of weirdos somewhere in the world. biggrin

Place your, now, holy bucket (wait for the Yellow Bucket Worshippers to surface) in an unholy bucket (?agnostic bucket). confused


Bung in a couple of scoops of wheat and cover with water. Cover and leave for 24 hours. The bucket, not you.

Drain and rinse twice a day - the bucket, not you. Save the water for the garden


When sprouts are visible, feed to chooks but anytime after the initial 24 hour soak is fine.

They have sprouted when the grain develops little tails, usually after a couple of days, depending on the weather, temperature, toxins in the water, phase of the moon or whatever.


Don't leave them too long without rinsing the grain or it ferments. cool

If you want to see what chooks look like after getting drunk on fermented grain sprouts, just watch your local members of parliament debate important environmental issues.

You will never see more dodging and weaving to avoid obstacles in your life.

Anyhoo, back to my other projects.

Til next time
.

Regards

Doc wink

Thursday, 13 August 2009

Tap that...

...sorry Megan McCauley wink

Today, Scarecrow went to turn a tap off but it would not turn off.
eek

Enter Super-Doc the washer-changing legend in his own lunchtime.
biggrin


Changing a tap washer is easy but for those who may not have done it before, it can be daunting, so here is how I do it.

Firstly, turn off the mains water.
rolleyes

Depending on where you live, this is often found near the front fence line of your property.

If you have never found yours before, now is a good time to look.

Grab some tools; a reseating tool, washers and adjustable wrench. Some old rubber tubing to protect the chrome if it is an inside tap.


Using your wrench, undo the tap.

Remove the assembly and check the washer. Get approval from a professional.


You can see the split in the washer at eight o'clock, can you not, Ninja.


Using the reseating tool, attach and proceed to screw it gently to clean the surface where the washer will meet the brass of the tap.


Grab your new washer and get approval to install it.


Screw the tap assembly into the base.


Go and turn on the mains water.

Admire the end result.


Not exactly rocket science, hey, but still has to be done. cool

Doc
wink

Back to my rocket science now. smile

Monday, 8 June 2009

A sartorial, pictorial tutorial...

...Cut to the chase...with sharp tools!

Recently I was having way too much fun so Scarecrow gave me all the shears and pruning stuff to sharpen. biggrin

Here is a quick pictorial tutorial on how to do it.

Whadjaneed
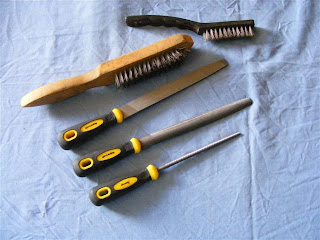
Some files including a round one if sharpening anything with a curve
Wire brush for cleaning the tools and the files
A clean area to work in
Glasses so you can see what the angle is on the blade you are sharpening!
Safety googles - had to say that for legal reasons - remember when common sense was the most common of all the senses, then along came lawyers! rolleyes


Usually I would start by thoroughly cleaning the tool first and then sharpen the tool.

For the sake of being easy to see the edge of the tool in the photos, I have left the cleaning until afterwards.

You will notice that each tool has a blade with a bevel on it. eek

When sharpening we will maintain said bevel and use short strokes moving the file away from the body.

It will only take a few such strokes to add a sharp edge.


This technique can also by used on other implements such as scissors and knives, honing the edges on a stone as needed.


A round file is used on the curvey edge of the shears.

Remember, you only need to use a few strokes, maybe 4 or 5 strokes.

Finish by giving the tools a good cleaning.


The finished tools can also have a light spray of silicone to provide them with some protection from rust.


All finished so I can now get back to having fun rolleyes

Enjoy your sharp tools

Doc
wink

Tuesday, 21 April 2009

I am spoilt

Well, this is not really a project of great note, but my work/toyshop was getting crowded so Scarecrow said I could have a new shed to put stuff in.

I dug up the dirt, created the formwork and together we both mixed and laid the concrete.

The chooks were watching us lay concrete.
rolleyes biggrin

Anyhoo, a week later we put the shed together.

Just wanted to share this.

Don't worry though, this blog is not going to turn into one of those blogs where I tell you what I had for breakfast!!!
eek

BTW, in the bottom left of the shed piccy is a solar light charging up ready to light up the shed.

Got to go now, more toys to make for the markets.


Doc
wink