Wicked Wicking Beds for the witless
Scarecrow (AKA the goddess - think: adore, worship, love, pedestal - you get my drift) suggested that I might like to do a tutorial on making wicked wicking beds so here it is.
Wadjaneed
Some stuff for the sides
Some other stuff for the ends
More stuff to join them all together - lots of stuff at my place! ![]()
Some plastic to line the bottom of the bed(s) with
(or you could just use an old freezer or other suitable receptacle that would hold soil and worms)
Some 2" slotted agricultural drainage pipe to get water into the bed
Some soil and stuff (see Scarecrow for more details)
Worms - not those of a personal nature, but the ones you grow in your worm farm. Everybody has a worm farm, don't they?
A spirit level <---betcha never thought I had one of them!
Sand or fine loamy soil
Mulch to cover the bed when you have finished
First of all, some points about wicking beds, so listen up.
1 Wicking beds are useful in an environment that does not have much rainfall. If you get plenty of rain and water is not an issue then maybe you should simply look at having raised garden beds.
We are not that far from a desert.
2 Wicking beds allow water to get to the area the plant needs (the roots, so the goddess informs me) by, you guessed it, WICKING! ![]()
Think of an oil lamp with a wick in the container that moves the fluid from the bottom of the container (the wicking bed) through the wick (the soil) to make the flame (or plant) at the top grow <--see what I did there. I believe the process is called capillary action, go look it up somewhere if you want.
3 The concept and application is as easy as it looks. Do not overthink the idea or you will never get the job done.
4 The total soil depth is about 300mm and water is poured into the pipe until the pipe sounds full then the water will 'wick' up into the surrounding soil. It is 'normal' for the topsoil to feel dry, since it is. The moisture is at the roots where it is needed.
If you don't believe me, ask Scarecrow. She knows these things. ![]()
5 Any excess water (yeah, right) in the bed will simply leak out over the 100-150mm plastic layer at the bottom. If you are using an old freezer drill a drain hole 100-150mm from the bottom of the unit to allow drainage.
6 If your bed seems to be constantly wet (and you have sought medical advice!), re-read point 1 a bit more slowly.
7 Be nice to your critter helpers in the garden

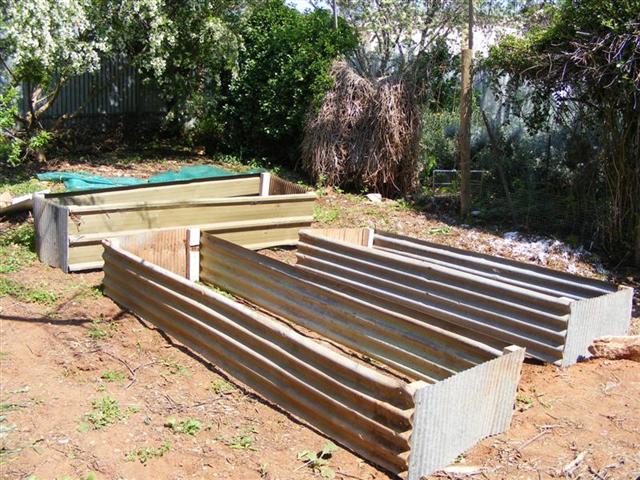
In the example within the goddess' garden, I have used some old galv iron that was lying around (actually, it was neatly stacked in my storage area within the garden, but you get the picture) and some scrap 4X4 timber supports from a friends veranda that blew down during a nasty storm.
You use whatever you have around or go steal from a neighbour.
Step 1
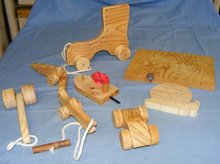
Cut everything to size. Use whatever you have (this is a frugal site, after all) but try to limit the width to something you can comfortably reach over from one side to the other without needing medical treatment later.
You can see several in the process of being made, here. The goddess thought I looked too quiet and happy in my workshop. ![]()

Step 2
Join the cut pieces together using whatever is available.

 Step 3
With help from your lovely, though a little bossy (!!), assistant, carry the bed(s) to their final destination.
Check for roominess, right way around-ness, knee-banging-ness, whether or not your barrow fits between-ness etc etc
Ensure management approves of the process. I do not like cats. ![]()
 Step 4
Find a willing volunteer and start the process of levelling the ground under where you are going to place your wicking bed(s). This is a very important part because the site must be level for water to move properly through the bed.

 Step 5
Carefully line the base of the bed with your plastic and smooth it to fit (without tearing). This can be trimmed to allow a depth of approximately 100-150mm.
You can place a little sand around the bottom of the plastic to hold it in place whilst you smooth and cut it.
Check the levels of the bed again.

Step 6
Measure, cut and lay your 2" ag drainage pipe (or equivalent) along the bottom of the bed and carefully cover with sand.
Keep checking your levels, this is important. One end of the pipe will be bent 90* and run up the end of the bed to allow you to pour the water in whilst the other end is blocked off.


Step 7
Once the pipe is covered, you are ready to start putting in some nice soil, complete with worms to bring the bed up further ready to plant into.
In the bottom of the piccy you can also see where the water will be poured in.

Step 8
Get out of the way as Scarecrow pushes her way through to plant some spuds in this particular bed.
These were planted, covered with soil and then covered in a layer of mulch. ![]()

Extras
Because I think the spuds are a little shy, Scarecrow fitted the bed with net curtains so they could have a little privacy whilst they do the growing thing. ![]()

Either that or it offered some protection from the plague of locusts that are expected within our area any time soon.
Yeah, that would be the reason, probably. ![]()
If you want to grow something up a trellis you can carefully place an appropriate trellis within the bed thusly and lay a couple of bits of wood across the base of said trellis to prevent it blowing over.
Clever, hey!
 Fill with your nice soil mix but be careful not to upset your levels.

Make sure it looks tidy, too.
 Voila.

Righty ho, any questions, you know how to get hold of me.
A couple of caveats (sounds like a foreign dish), though.
I can tell you all about building the beds but the goddess is the one to ask about what to grow and when. It's her job to grow the stuff, my job is to just cook it so don't ask me if now is a good time to plant <insert stuff here> or not.
Anyhoo, til next time, I'm off to hide.
Love, peace and mung beans.
Doc ![]()