Things to do list

  • Workshop Tips
  • Bread Rolls
  • Gourd Crafts
  • More Toys

Counter

Sunday 6 December 2009

Wheel meet again...

...on Doc's wheel jig.

Hi all. Another quick workshop hint.


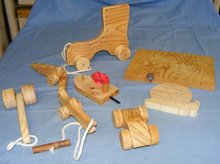
This is for those who make toys with wheels and need some way of finishing them and allowing them to dry.

I usually use Danish Oil to finish my wheels but this jig will work for hand or spray painted wheels too.


Sorry it is only another short posting, but it is close to christmas and in between making soap moulds, building and repairing spinning wheels and making all sorts of toys with wheels, I have not made the time to do a 'long' post here.


Rest assured I will as soon as I can. cool

In fact, I am hoping to put up a quick tutorial on soap making for those of you who have not made the jump into it yet, so stay tuned.
biggrin

Wojaneed
A couple of blocks of wood larger than the diameter of your wheels (otherwise the wheel will touch the ground - duhh)
Some thin dowel (3mm is good)
Flat space to 'finish' the wheels and leave to dry.

Step 1
Drill a hole into one block to fit the dowel into it.


Step 2
Finish/paint your wheels and thread them on to the dowel.


The end of the dowel that is not in the hole, will rest on the top of the block at the other end.


Need me to go over any of the steps?

Thought not.
rolleyes

Now if you will excuse me, I have work (fun though it is) to get on with.


Watch this space.


Love, peace and mungbeans


Doc
wink

Tuesday 10 November 2009

Hold on to your nuts...

...with this handy hint. cool

Another quick and handy tip for those who need a small wrench to access a tight place that your normal adjustable wench, erm, wrench will not get to.

Watjaneed
A bolt
A pair of nuts to fit the bolt
Keeping up with me so far? cool


Check out the pix for detailed instruction.


I recently had to use a bolt set up like this to undo a nut that was on the car that was so accessible - not.

I could not get the adjustable wrench in the small space.


Where do car makers get people with such small hands? Child labour?

Anyhoo, just a quiccie for you.

Regards

Doc
winkcool

Monday 19 October 2009

Mouldy old dough...

...no, not a baking hint.

G'day everybody.

Let's make a soap mould (mold, for my US friends).

These are great sellers at craft markets.

I even use one myself.
eek

Watchaneed

Some timber (lumber) cut to size (base, two sides and two end bits plus a spare end bit as a spacer when you glue up) I use certified plantation grown pine - coz I am a tree hugger dude
Four bolts and wing nuts
Glue
Ethical Chocolate - no reason, but you can not have too much chocolate

Get ya stuff together.


Do not ask me about sizes, the length was determined by what I could cut on my bandsaw - about 345mm.

The sides are about 100mm high coz, well, that was the size of the scrap wood I had available.

Do not fret coz I am sure if you make a soap up, it will fit, otherwise have some plastic gloves handy.

I find that any leftover soapmix can be poured into the gloves and be sold as...
...you guessed it, hand soap.

Mark up the ends for where the bolt holes need to be.


Drill out using a drill (duhh, who would have thunkit?)

Use these ends as templates to locate the holes for the bolts later.

Whilst you are at it, glue up and clamp the assembly.
smile


Drill out the bolt holes.


If you have a tap set, you can create a threaded hole otherwise just screw the bolt into the ends.


Put some super glue into the holes.


Screw the bolt into the end of the sides.


Cut the bolt to size. BEWARE - you need to know how far in your bolt is into the wood.


Hey, check out the offcuts for some other future project


Unscrew the wingnuts - this will clean the threads.


With a saw (or bandsaw) create a kerf thingy to allow you to cut the soap to size.


This is where you need to know how far the bolt is into the wood - a bandsaw blade is waaaay too expensive to waste on breaking when you locate the bolt with it.


The end result can be coated with Danish oil - or anything else, but since I use Danish oil to finish most of my toys, gourd stuff and spinning wheels, I tend to have some of this around.


Now, do not forget that you have to use something like baking paper or some other barrier to pour the soap mixture in so it does not destroy thr mould (mold).

On ya
smile

Doc
wink

Monday 21 September 2009

Why do you build me up, Buttercup baby...

...just to buy one of Doc's toy kits.

Getting ready for Christmas by trying out a few new ideas - cheap (read affordable) kit toys.

I have done this before but not in as much bulk as I do now.

The idea is that the kit contains the wheels, axles, shape and a mallet to allow an older child to make a toy (generally a vehicle) on their own or a younger child (say under four) with assistance from mum/dad/caregiver/lawyer etc etc.

Much of the gear is made up from scraps that I store away in the future projects-in-waiting (scraps) box.


Watjaneed
Wood for the main shape (duhh!)
eek
Dowel for axles
Thicker dowel for mallet
Wheels
Drill and bits for drilling (who would have thought)
Ziplock bags to put the parts into
Nice label

Cut the shape of the toy - tractor, bus, racing car etc etc

Cut out wheels accordingly, depending on what size you require eg the tractor will have two larger rear wheels and two smaller front wheels, the racing car may have four thicker wheels, and so on.

Sand smooth and round any edges.

You can finish with a Danish oil or not.

I like to leave the finish up to those who purchase the kits.

I usually suggest that young kids enjoy drawing with a felt pen or painting with water based paints.

Make the mallet by cutting a length of thick dowel for the hammering part - prolly has a name like 'head' or something.

Repeat this process to create a handle that fits into the 'head'. Glue these together.

Measure and cut your axles. Allow for a small overlap.

Put into your bag and add a nice label.

These sell at an affordable price so that even little Freddie/Sally can pick one up out of their pocket money budget.

On one side of my label I have a no-text pictorial on how to assemble the toy.

The first thing is to check the contents.


Then attach the two axles to two wheels.


Thread the wheels and axle through the predrilled holes in the vehicle...


...and knock in the remaining wheels.


I sell these at several galleries and markets (where I keep Scarecrow company whilst she sells produce and seedling thingys). wink

They sell well as the guilt sets in when the purchaser realises just how little quality time they spend together with their young ones. lol

Makes for a nice, cheap day out together.
rolleyes

Love, peace and mungbeans

Doc
wink

Thursday 10 September 2009

Core..

...check this out

There I was in my toy/workshop looking busy (otherwise Scarecrow finds me things to do) when in walked a beautiful, long legged brunette (with a hint of grey) and sided up to me and whispered those three magic words...
eek


...soil core sampler.

Well, it did it for me.lol

Yep, Scarecrow wanted me to make her an auger for taking soil samples.

Bear in mind that this is made from stuff I have at hand, so do not get hung up on precise sizes.cool

Wadjaneed
Galvanised pipe (any length) mine was 550mm long (as per request), 25mm diameter threaded at one end to allow for the fitting of a...
Metal cap to fit
PVC pipe (I used electrical conduit) for inserting to act as a plunger
Wooden dowel to fit into the pvc pipe at one end
Long bolt and nut - acts as a handle when it comes to pulling the auger out.

Whatdja do
Cut the galv pipe to size leaving the thread on one end.


Cut the PVC pipe about 50mm longer.


Cut a 20-30mm length of dowel and stick it in one end of the pvc pipe.


Grind the end of the pipe to form a 'sharp' end. This makes it easier to enter the soil.


Drill a hole near the top, under the cap.

The end result:


To use, hold the pipe pointy end down and hit it with a mallet until you reach the required depth.

Using the bolt as a handle, twist the auger a little to allow ease of extracting it.

Undo the cap and push (carefully) the pvc plunger through the hole to put your sample on to your sample sheet - this can be a plastic sheet, a bivalved pvc pipe or whatever.

I gave this to Scarecrow and she said those other three magic words. wink

A real babe magnet, that auger.

Doc wink