Things to do list

  • Workshop Tips
  • Bread Rolls
  • Gourd Crafts
  • More Toys

Counter

Showing posts with label workshop stuff. Show all posts

Thursday, 17 November 2011

I'm all stuck up...

...Ah, ha, ah ha! <--looks nothing like how I said it!

Okay, shoppers, I've been away from frugal, cyber space for a while so thought I would get back into the swing of things by sharing some of those useless tips that change your outlook on life forever!

I use tubes of those 'liquid nails'(TM)-type stuff
.

You find them at your local hardware shop
in convenient sizes like more than enough to stick a 20 tonne truck back together or nearly enough to reattach false eyelashes.

Invariably, this means you buy the size to do the job and hope you don't have too much left over.

Well, for those of us who do have too much left over, here are a couple of things you may want to try using the glue for.

For those who have never used liquid nail/no more nails or whatever TM names it goes under, it is a special glue in a cartridge and it dries as hard as, erm, nails!

So. When you have finished glue nailing your plasterboard to the bathroom ceiling or whatever, what sort of things can you do with the leftovers?

How about making Doc's knobs of all sizes to suit your knob requirement (sounds rude)?

Waddleyaneed:
Big tube/cartridge of leftover Liquid Nails (TM)
Clicky thing to squish said leftover glue -you know what I mean - you have to buy a new one each time because you never remember where you put the old one. I have six at the moment!
Bottle lids of many sizes
Bolts of many sizes to suit your needs
Wooden clothes pegs

Step 1
Get all the stuff together so you can take a neat photo and give people a better idea of what the hell you are on about.

Note the blue clicky thing with the glue cartridge in it.


Step 2
Grab a lid and fill it with the liquid nails glue stuff from your clicky thingy and whack in a bolt.

Step 3
Repeat step 2 as required and whack in another bolt, held securely(ish) with a wooden peg if it won't stand up by itself.


Step 4
When completed, allow to dry (a few days to get hard - fwaar!) then stand back and reflect the important question of life...Why did I do this?


I have arthritic hands (seriously!) and have used these knobs as an aid to help me unscrew bolts from some of my woodwork machines - lathe, drill press, scroll saw and the like.

They dry hard (the glue not my hands) and I find they are easier to grip.


You may think of a multiple of uses for these knobs eg drawers knobs.

If you can think of more than five uses, you probable need to get out more!

Okay.

We still have not used up all our glue (who'd have thunk it). So what else can we do?

How about a great, easy-to-make, Doc's storage container for all those nice, easy-to-handle knobs you made.

Waddleyaneed:
A DVD/CD pack thingy
Hacksaw/sharp knife/good teeth
Some more of that hard as nails glue stuff
The clicky thing that squirts the glue out
Room under a shelf

Step 1
Grab your CD/DVD pack and take apart thusly:


Step 2
Cut the sticking out bit off with the implement of your choice.


Step 3
Under the shelf where you are going to attach the container, apply a couple of dobs of the glue from the clicky thing and stick the base to the underneath of the shelf.


Step 4
Allow to dry - the glue not you -(it wasn't that much hard work) and when dry attach the other part of the CD/DVD pack and fill with useful items such as the knobs we made previously.

Note how the dust already in situ under the shelf remains in place.

Obviously the cleaner had not been into my workshop immediately prior to me taking the photo.


Step 5
Ponder the logic of now having a single container permanently stuck to an area under a shelf that you can not actually get to with ease!

Oh well, somebody might find it a useful tip.


Anyhoo, got to get back to making more toys before I run out of the hard-as-nails stuff.

Doc ;-)

Sunday, 12 September 2010

Feed the birds...

...tuppence a bag - yeah, I'm sure Mary Poppins fans will be crying into their soup about now. wink

Anyhoo, here are a couple of cheap and easy(ish) feeders/troughs for your feathered friends - chooks/chicks/chickens/fowl <--just helping out search engines.

They are made from stuff that I had lying around but I am sure you could probably rustle up some similar stuff or else steal it from somewhere. eek

The goddess (Scarecrow) requested that I make our chooks something nice to eat out of.

Obviously I just never look busy enough.


Being the dutiful 'henpecked' hubby (not really, but thought I could squeeze in a chook joke) this is what I came up with.

Wadjaneed
Some PVC pipe of some diameter or other about the length you need
Some wood for the ends
Hammer or mallet for, erm, hammering or malletting(?) eek
A drill or drill press <---Legal Warning: Fast, sharp thingy
A saw for, erm, sawing <---Another legal warning: Fast(ish) sharp, thingy that bites
Some gadget for making big round holes in wood (also called hole saws)
About half an hour (but you can drag it out if you need to impress)
Some chooks to try it out on - the feeder not the hole saw

This piccy shows the gear needed to make two feeders/troughs.


Step 1
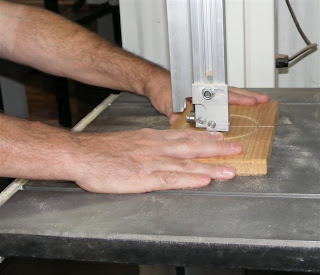
Using your hole saw, cut about a third into the wood to make a shallow, groovy circle in your wood.


Step 2
Carefully measure (yeah, right) to cut the circle in half on each piece of wood.

Please note, this piccy was staged. I've never used a measuring implement to do this in real life.


Step 3
Cut circles in half, carefully <---watch out for pinkies. eek


Step 4
Take time to admire your handiwork and wonder how much longer you can look busy before you're sprung for another task.


Step 5
You now have two ends for each trough almost ready to rock and roll.


Step 6
Cut the PVC pipe down the middle (don't forget the sharp, fast thingy warning). This can be done with a hand saw if you do not have a bandsaw.


Step 7
Become awed at your greatness as you stare at the collection of bits that you have now made. cool


Step 8
With your hammering device, knock the wooden ends onto the end of the PVC pipe. If it doesn't fit, you can carefully sand or file the edge of the pipe to get it into the groove.

Repeat this for all ends.

Watch your pinkies - mallets hurt - don't ask me how I know this. rolleyes


Step 9
Bung the end product on the concrete so you can show everybody the completed project.


Step 10
Bask in the praise of the goddess and allow her to make a fuss of you. Sorry. You are not getting any pictures of that. wink wink

Well, there's another ten step program for you to try.

Break a leg <----Wonder if you can say that in the States or will somebody sue you cool

Peace.

Doc wink

Wednesday, 4 August 2010

Wooden it be nice...

...Oh, no. Not another lot of scraps from the Docs Wood Den.

Yep.

Aussie, Aussie Aussie, Oi, Oi,Oi and another Aussie!<---added an extra 'coz there are four. (New Aussie National Anthem)
lol


Now, this guy has been dogging me for a while. biggrin


Do these stripes make me look tall?


Do these stripes make me look fat!


OMG...Aliens!!! (Looks sooo like a nativity scene to me). And they have stripes. biggrin


You've heard of a one knight stand, yes? He's on the left. wink


Animal magnetism. Can't see the attraction, myself. wink


Do these stripes...oh forget it.


Why hygiene is important to elephants.


What did he write about us?


The one that got away was this big. cool


It's knot stripes I have to worry about


Typical rabbit. Start off as a three piece...


...in no time at all you end up with more


Time to sleep on it.


I'm too cute to worry about stripes cool


Sorry about all that. It is said every pun has its just reword!

Thought I would chuck these up whilst I had a few minutes before the Goddess finds me.

Peace

Doc wink