Simple Frugal Toys
Frugal Toy
What you need:
Some plywood or Custom board around 6 to 9 mm thick for the main puzzle
As above 3 to 6 mm thick but the same size as above for the backing
Scrolling saw or fretsaw
Step 1
Draw your puzzle picture onto the thicker piece of wood. If you cannot draw very well, old colouring in books have good pictures in them. Even a photograph will do.
Step 2
Using your saw cut out the picture
Step 3
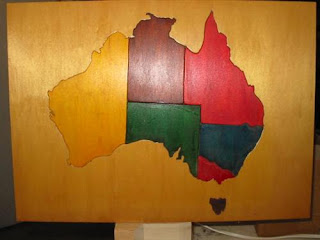
Colour as you wish. Many of these where stained using food colouring and finished using Danish Oil


Let the imagination flow
This circle puzzle was made using a hole cutter.

Select several obviously different sizes and put a small piece of dowel into the hole as required (actually, you could put dowel in any of the puzzle according to the ability of the child)
Step 4
Apply wood glue to the thinner backing board (just the areas that are in contact with the top piece and clamp the two surfaces together until the glue is dry.
Step 5
When the glue is dry sand the edges for sharp bits and watch a childs face light up.
Regards Doc

No comments:
Post a Comment